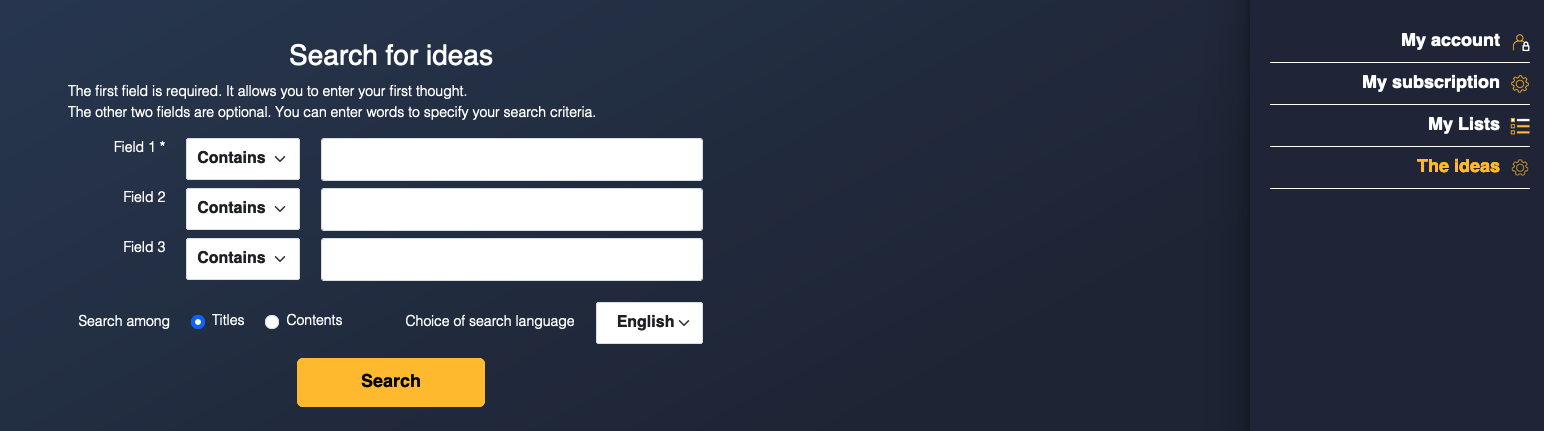
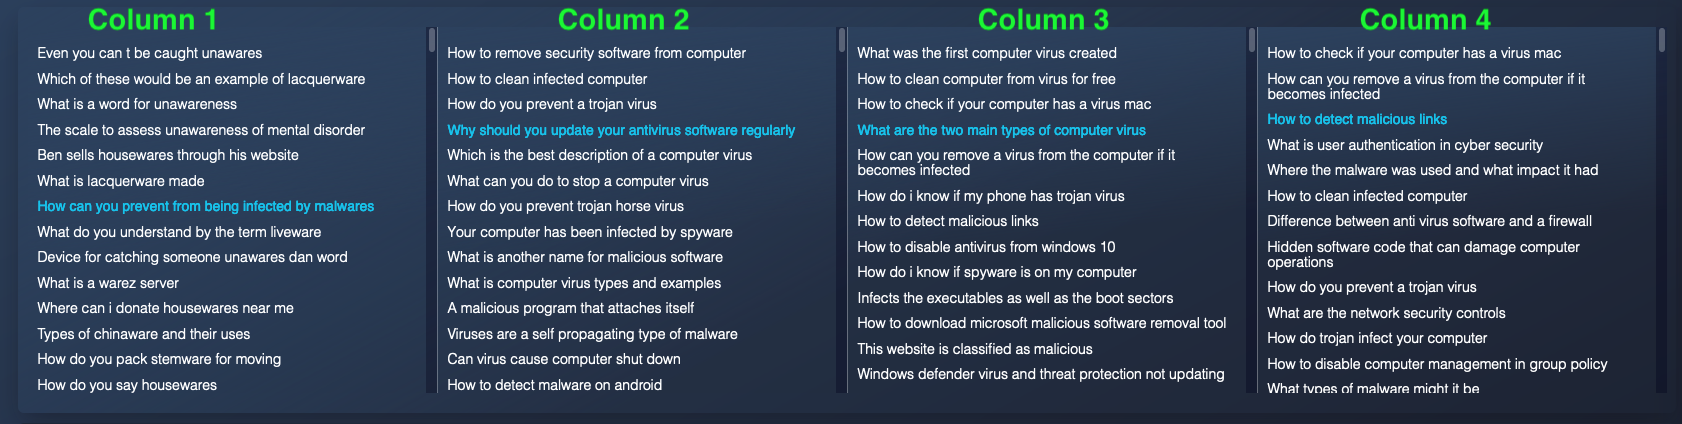
The view tree
First column
After an initial search, you arrive at the view tree, which currently only has one column.
A) Resuming your initial search criteria
B) Indication of the number of results from your initial search
C) List of results limited to the smallest number between the maximum number of results allowed for display and the number of results from the initial search.
D) Depending on the number of results, a scrollbar allows you to navigate through the results authorized for display.
Each result displayed in the list is clickable.
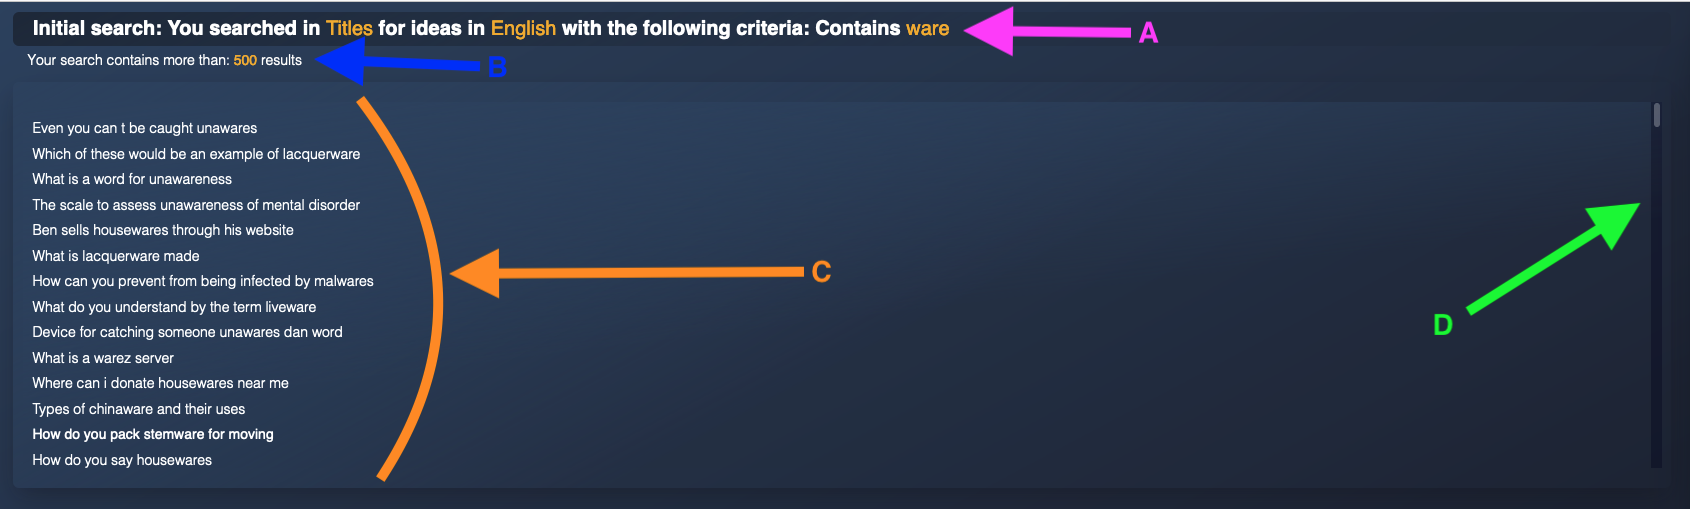
Second and third columns
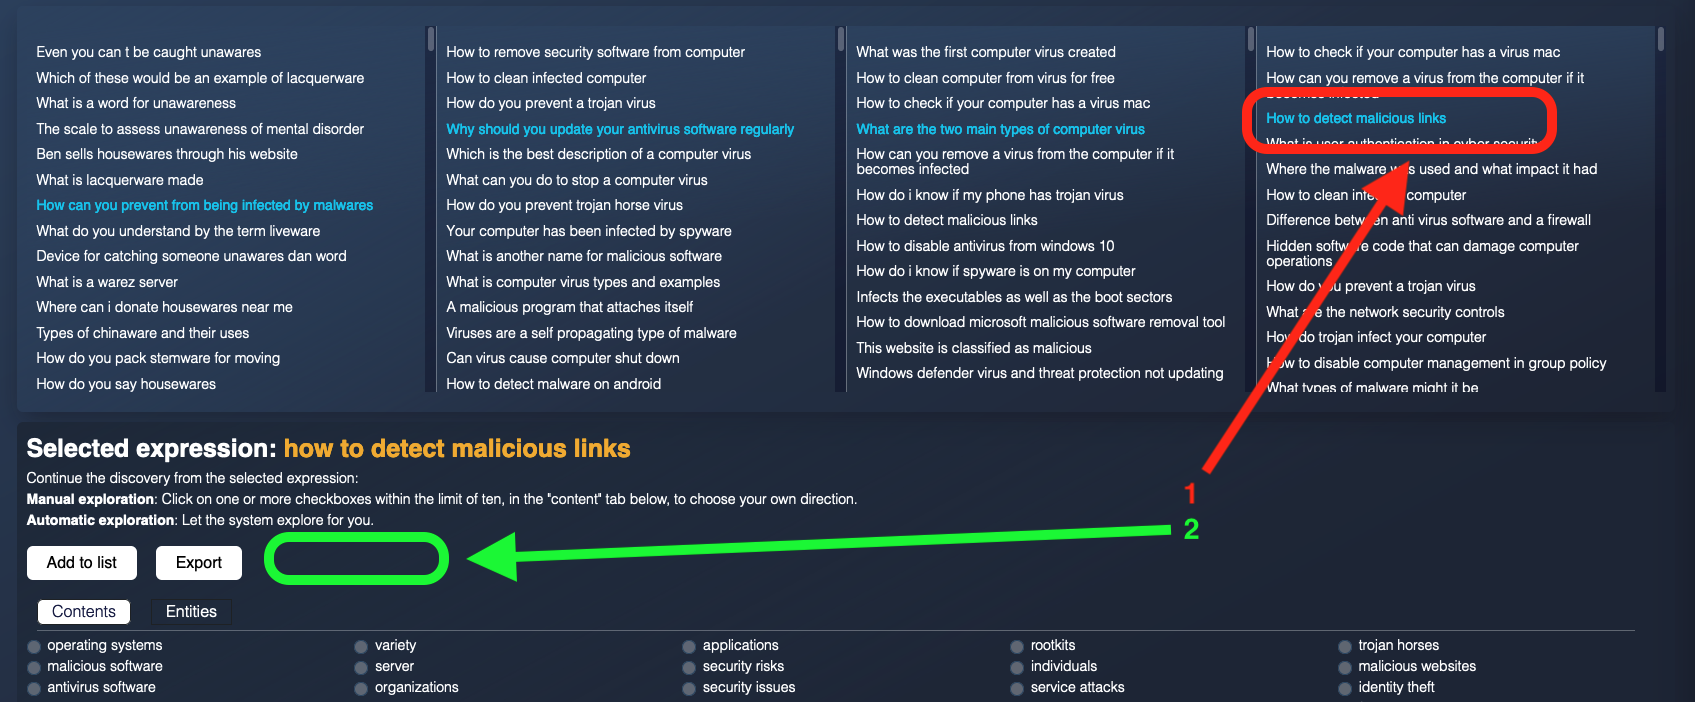
Clicking on a topic idea gives you access to the details of this idea. This point is explained in another bellows of the accordion display.
A) In the detail of an idea, you can explore that idea. It then changes color in relation to the other ideas.
B) Exploring point A) above generates a new search, the result of which is displayed in the second column of the view tree.
You can repeat this operation on an idea from the second column. The result will be displayed in the third column.
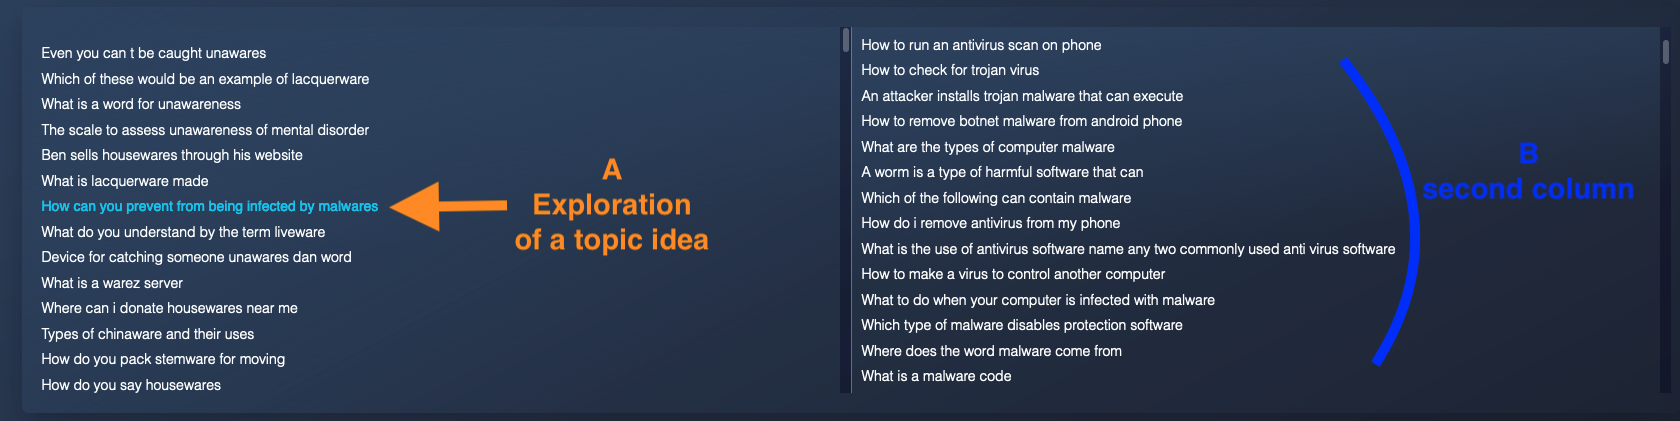
Fourth and last column
We arbitrarily chose to stop at four levels.
By exploring an idea from the third column, the result will be displayed in a fourth and final column.
This last column allows you to access the details of the subject ideas it contains but does not allow you to continue exploring.
The colors of the ideas explored show you the current progression.
Resizing the columns of the view tree
You can resize the width of the columns.
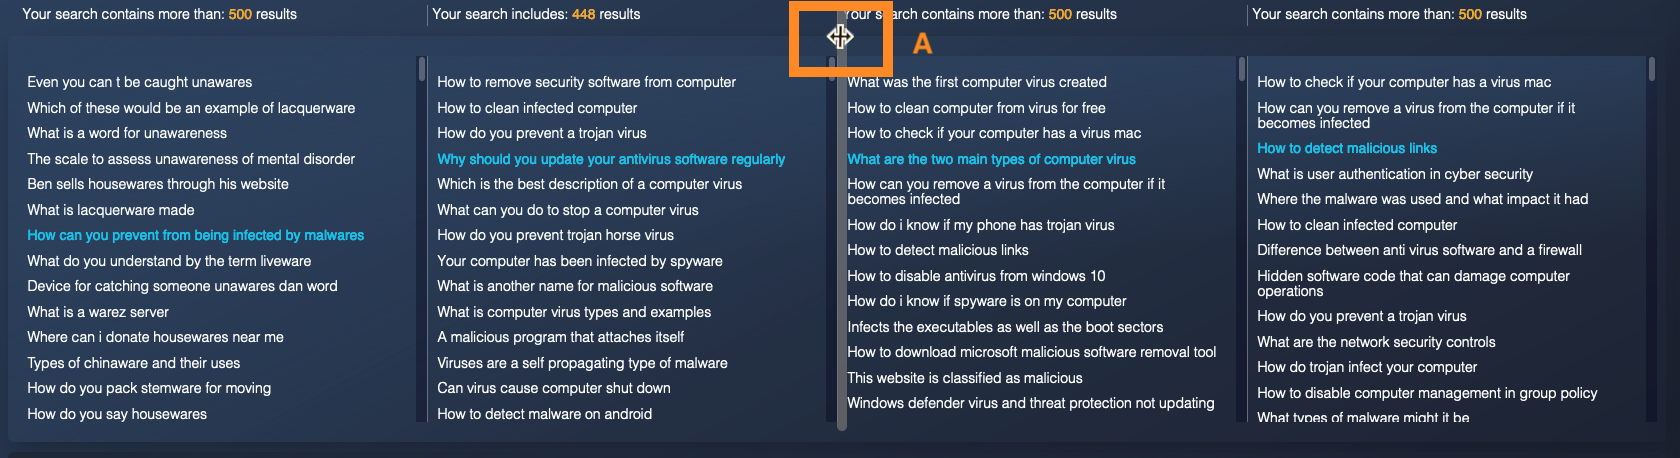
A) To do this you need to position yourself between two columns. A large vertical line appears and your cursor changes shape.
You need to move this vertical line to widen or narrow the column in question.
Example of resizing the view tree
In this example, column 2 was narrowed and column 3 was widened.
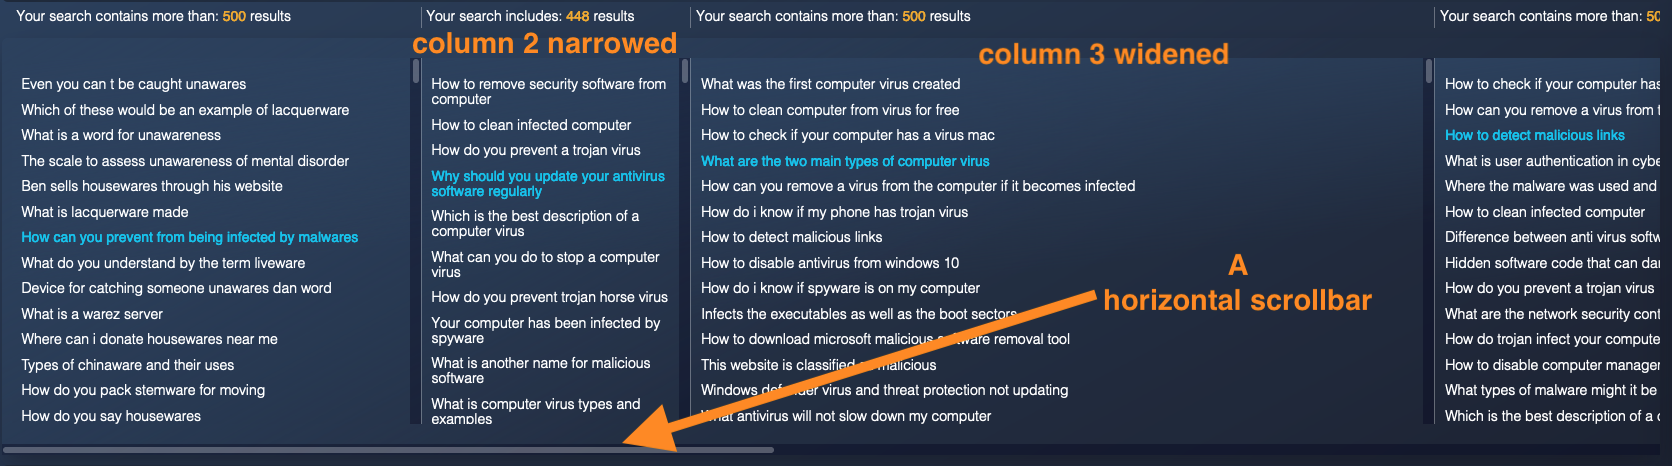
A) A horizontal scrollbar allows you to navigate through the resized columns to reach the entire view tree.
Colors in the view tree
You will find three colors in the view tree.
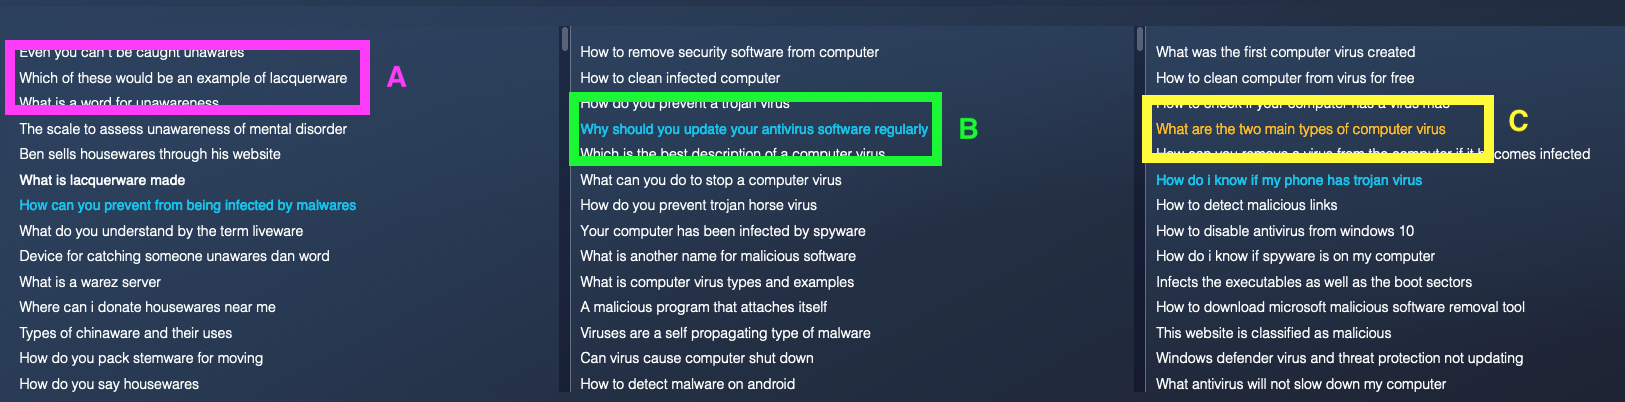
A) The first color is white. This is the most common color. It means that the topic idea has not yet been explored or is not selected.
B) The second color is blue. This means that the topic idea is being explored. When it comes to the fourth column, it means that the idea is selected.
C) The third color is orange. This means that the topic idea has been explored, but it is not currently selected.
These different colors allow you to see the current progression and the ideas already explored.
Detail of a topic idea
When you click on a search result, the details of the relevant topic idea are displayed.
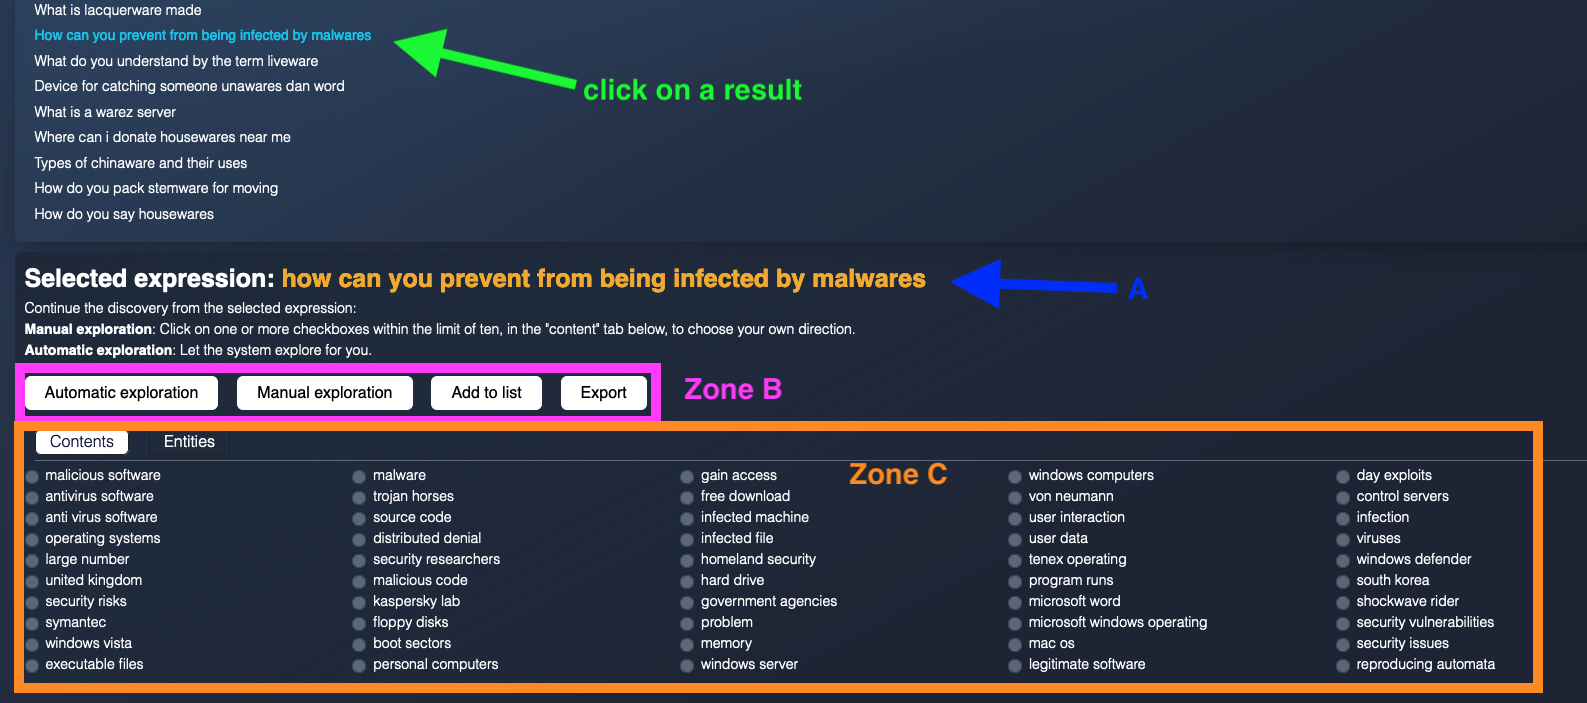
A) Replays the title of the search result you just clicked on.
Zone B) This zone has 4 buttons allowing you to perform several actions related to the selected topic idea: automatic exploration, manual exploration, adding to a list and exporting.
Area C) This area displays the details of the topic idea. It has 2 parts: contents and entities.
We will first explain zone C before going into zone B in more detail.
Zone C
Contents of a topic idea

A) « Contents » is the first tab in the detail of a topic idea.
B) Here you will find the list of signs associated with the current subject idea.
Entities of a topic idea
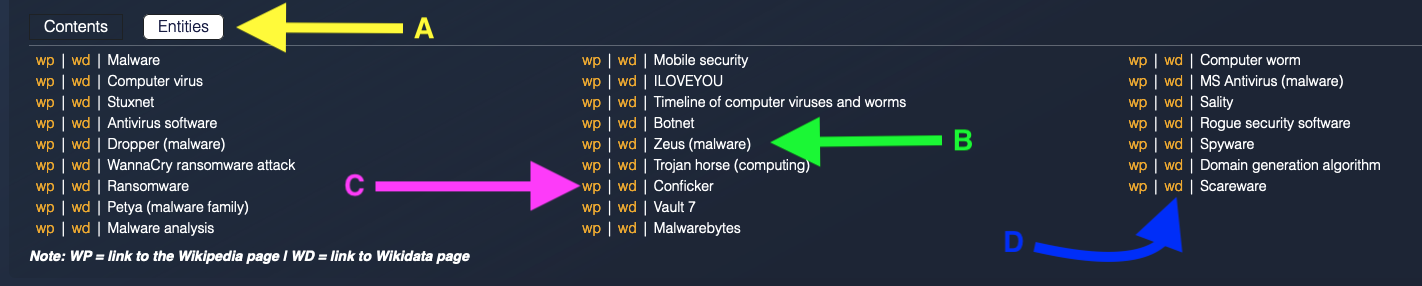
A) “Entities” is the second tab in the detail of a topic idea.
B) Here you will find the list of entities associated with the current topic idea.
C) For each entity, you have a link (wp) to its Wikipedia page.
D) For each entity, you also have a link (wd) to its Wikidata page.
Zone B

A) Automatic exploration: The Online Service will explore the current topic idea itself. It will offer you results that have signs in common with this idea. These results will be displayed in the column following the column of this idea.
B) Manual exploration: You will have to select signs, up to ten (10). Then, the Online Service will explore the current idea according to the signs you have chosen. The results will be displayed in the column following the column of this idea.
C) Add to List: This button allows you to store the current topic idea in an existing or newly created list.
D) Export: This button allows you to export the current idea. You will find in the generated file the signs and entities making up this idea.
We will now look at these four actions in detail.
Automatic exploration (columns 1 to 3)
Warning: this automatic exploration is experimental, but it gives good results for English searches. These results are often better than those of manual exploration.
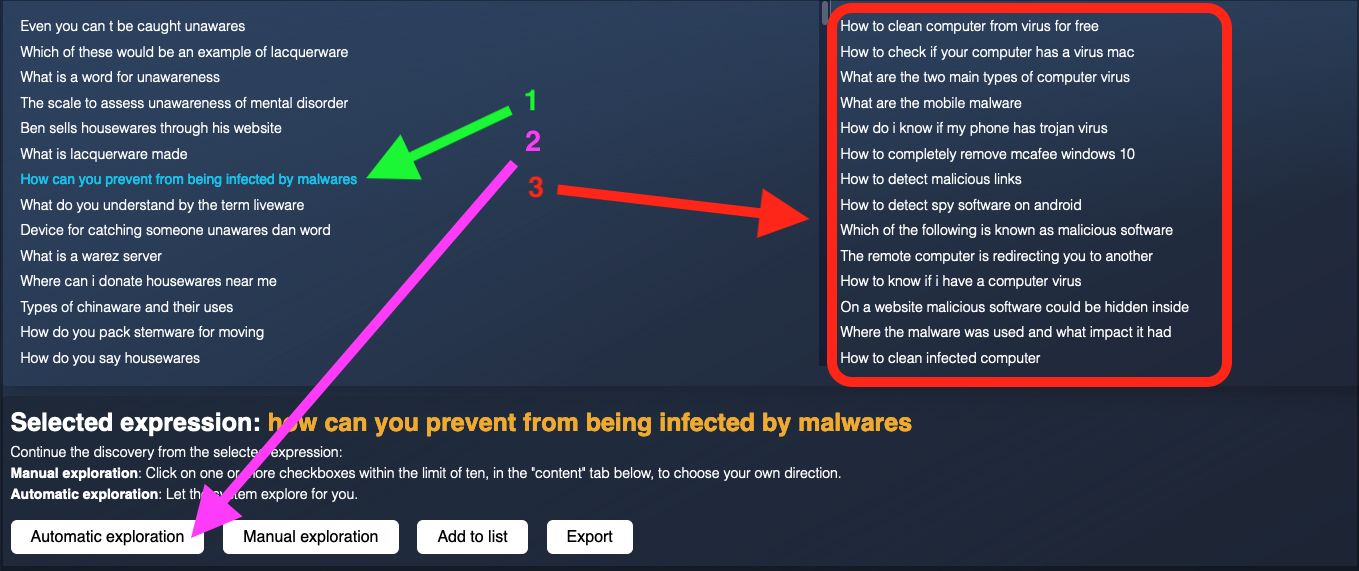
1) You select an idea. Its details are displayed below the list of ideas.
2) You click on the “Automatic exploration” button.
3) The exploration result is displayed in the next column.
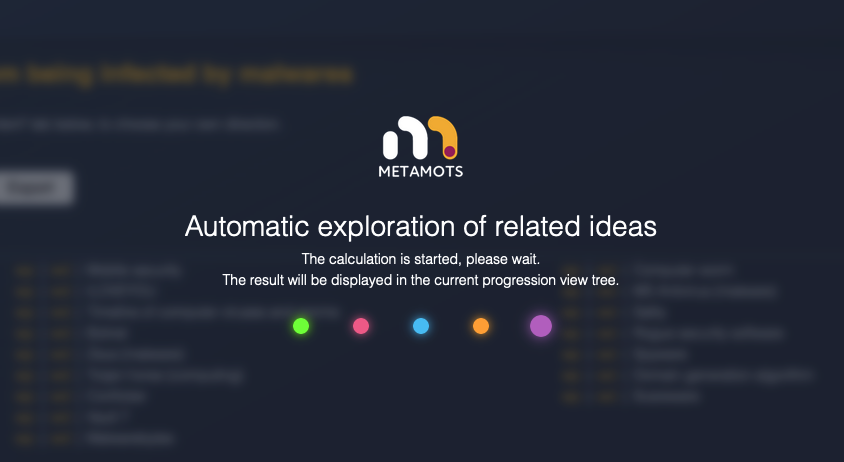
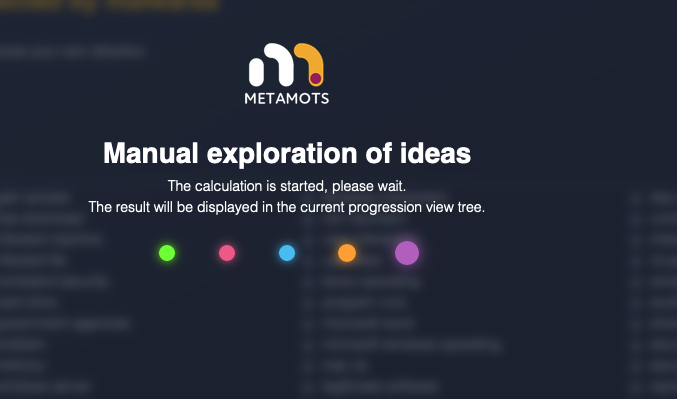
There may be some time between step 2 and step 3 above.
A waiting screen keeps you waiting.
Manual exploration (columns 1 to 3)
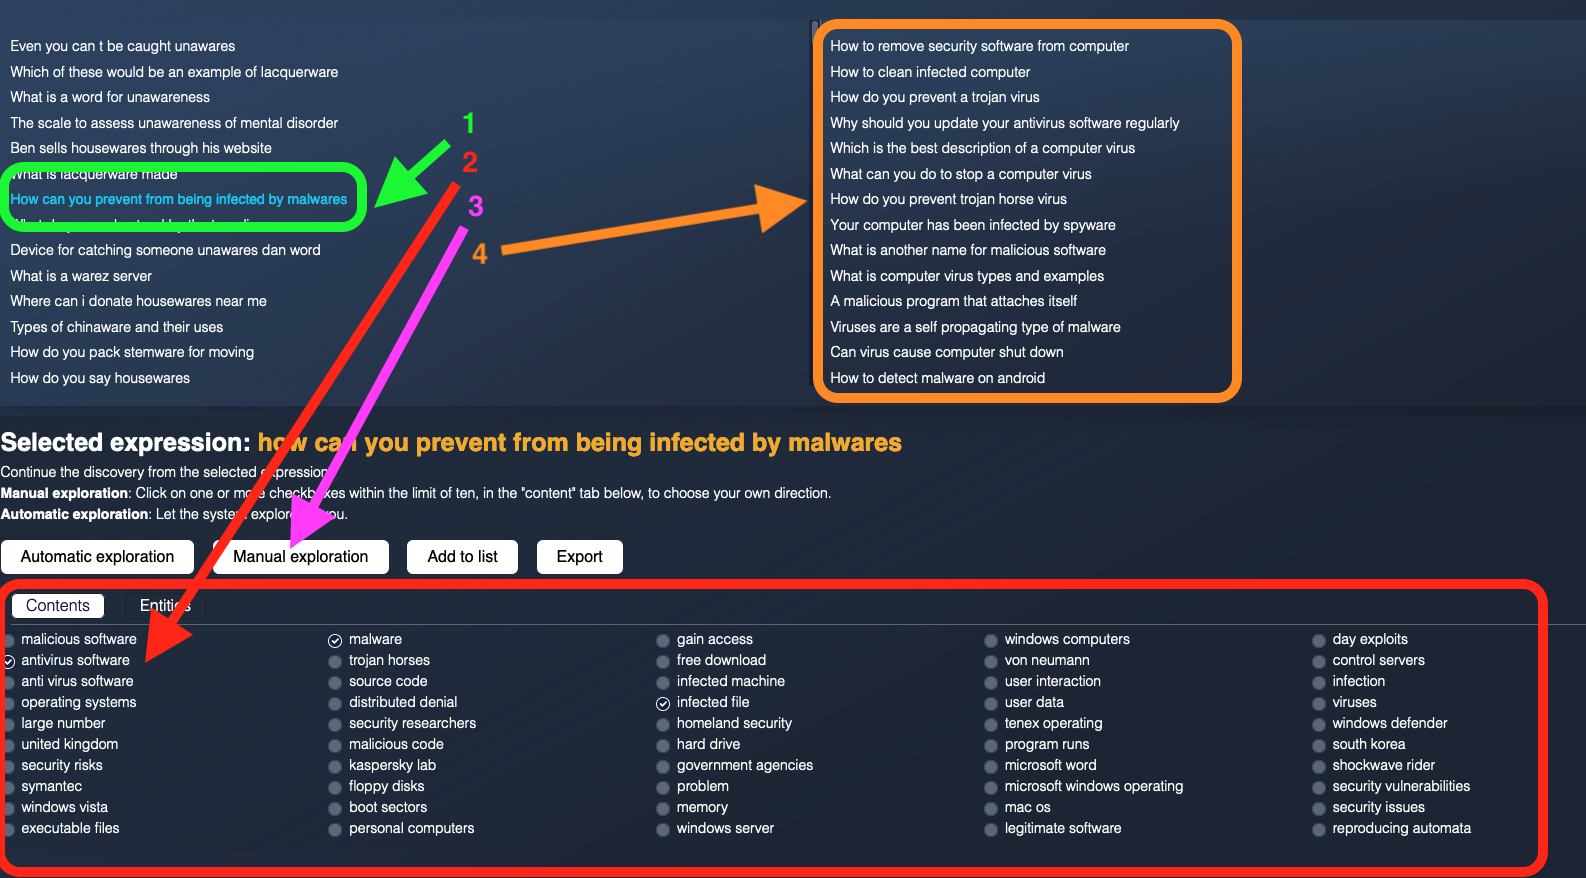
1) You select an idea. Its details are displayed below the list of ideas.
2) You select from 1 to 10 signs in the contents of the idea.
3) You click on the “Manual exploration” button.
4) The exploration result is displayed in the next column.
There may be some time between step 3 and step 4 above.
A waiting screen keeps you waiting.
Exploring the last column
1) You select an idea in the fourth column. Its details are displayed below the list of ideas.
2) As we have limited to 4 columns, you don’t have access to the explore buttons.
Add to a list
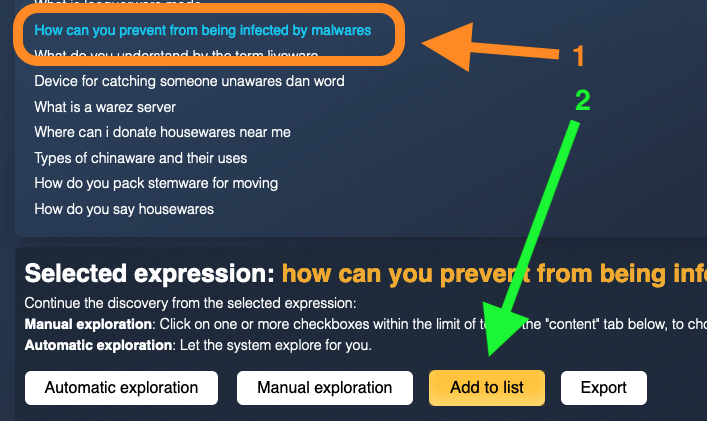
1) You select an idea from the results list.
2) You press the “add to list” button
A window opens offering you two options.
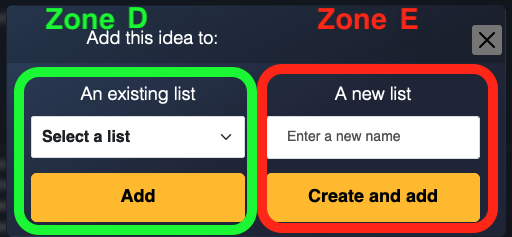
Zone D allows you to add the selected idea to an existing list.
Zone E allows you to create a new list and add the selected idea to it.
We will first explore this zone E before returning to zone D.
Zone E
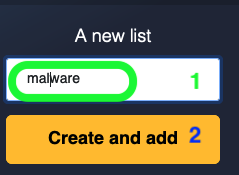
1) Enter the name of the list in the field.
2) Press the “create and add” button.
This last action will first create a new list whose name will be the one entered in field 1. Then, it will add the selected idea to this list.
A confirmation message will then appear.

Zone D

1) Click on the drop-down menu. You will see the names of the existing lists. You must click on its name to choose a list.
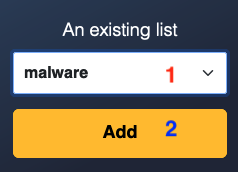
1) The drop-down menu displays the name of the selected list.
2) Press the “add” button. This will add the current idea to the selected list.
A confirmation message will then appear.

Export an idea
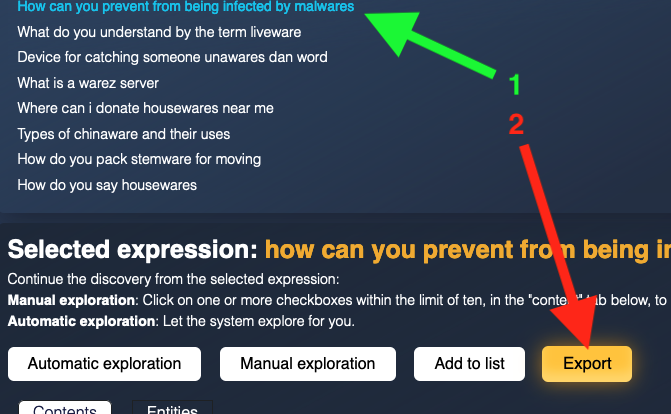
1) Select an idea from the list.
2) Press the “export” button to get the data related to this idea.
A window opens asking you to save the file.
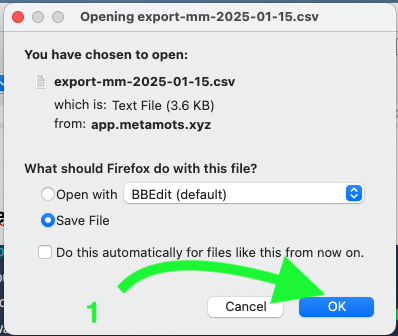
1) Pressing “ok” will allow you to save the file to your device.
In the file you will find the following information:
– the selected idea,
– his signs,
– its entities.
You will also find, for each entity, its Wikipedia link and its Wikidata link.
New search
As long as you explore the ideas in the view tree, you remain in the universe of your initial research.
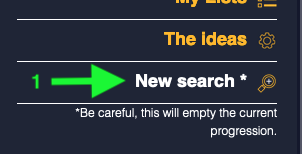
To change this initial query you need to make a new search. To do this you need to use the “new search” button from the menu in the right sidebar.
You will then go to the initial search screen.